The Google sign-in button lets users authenticate quickly and securely using their Google Account. It instils trust, eliminates the need for separate usernames and passwords, and increases user sign-ups and conversions. It can be customised to match website design, supports auto sign-in and one-tap functionality, and provides a reliable and efficient authentication solution. For more information please refer to the official Google documentation.
The Google sign-in button has several use cases that make it a valuable tool for website authentication:
- Quick and secure authentication: The Google sign-in button allows users to authenticate quickly and securely using their Google Account credentials. This eliminates the need for users to create separate usernames and passwords for your website, saving them time and reducing friction during the sign-up process.
- Increased user sign-ups and conversions: By offering the option to sign in with Google, you provide users with a familiar and trusted authentication method. This can lead to higher sign-up rates and increased conversions, as users are more likely to feel confident and comfortable using their Google Account to access your website.
- Customizable to match website design: The Google sign-in button can be customized to match the design and branding of your website. This ensures a seamless and cohesive user experience, as the button will blend in with the overall look and feel of your site.
- Support for auto sign-in and one-tap functionality: Once a user has signed in with their Google Account, the Google sign-in button can support auto sign-in functionality. This means that subsequent visits to your website can automatically authenticate the user without requiring them to go through the sign-in process again. Additionally, the one-tap functionality allows users to sign in with a single tap, further reducing friction and enhancing user convenience.
- Reliable and efficient authentication: The Google sign-in button provides a reliable and efficient authentication solution for your website. It leverages Google's robust infrastructure and security measures to ensure that user authentication is handled smoothly and securely.
By incorporating the Google sign-in button into your website, you can streamline the authentication process, increase user sign-ups and conversions, and provide a secure and trusted authentication method for your users.
Case Studies
- Pinterest: By integrating the Google sign-in button, Pinterest experienced a significant increase in new user registrations. Users were more likely to sign up for the platform when presented with the option to authenticate quickly and securely using their Google Account. This streamlined the registration process and eliminated the need for users to create separate usernames and passwords.
- Reddit: Similarly, Reddit saw a 2x increase in conversions after implementing the Google sign-in button. By offering users the ability to sign in with their Google Account, Reddit provided a familiar and trusted authentication method. This instilled confidence in users and made them more likely to complete the sign-up process, leading to a higher conversion rate.
Steps
To add the Google sign-in button to your website, follow these steps:
Getting your Client ID
Create a Google Cloud project: Go to the Google Cloud Console and create a new project if you haven’t done so.
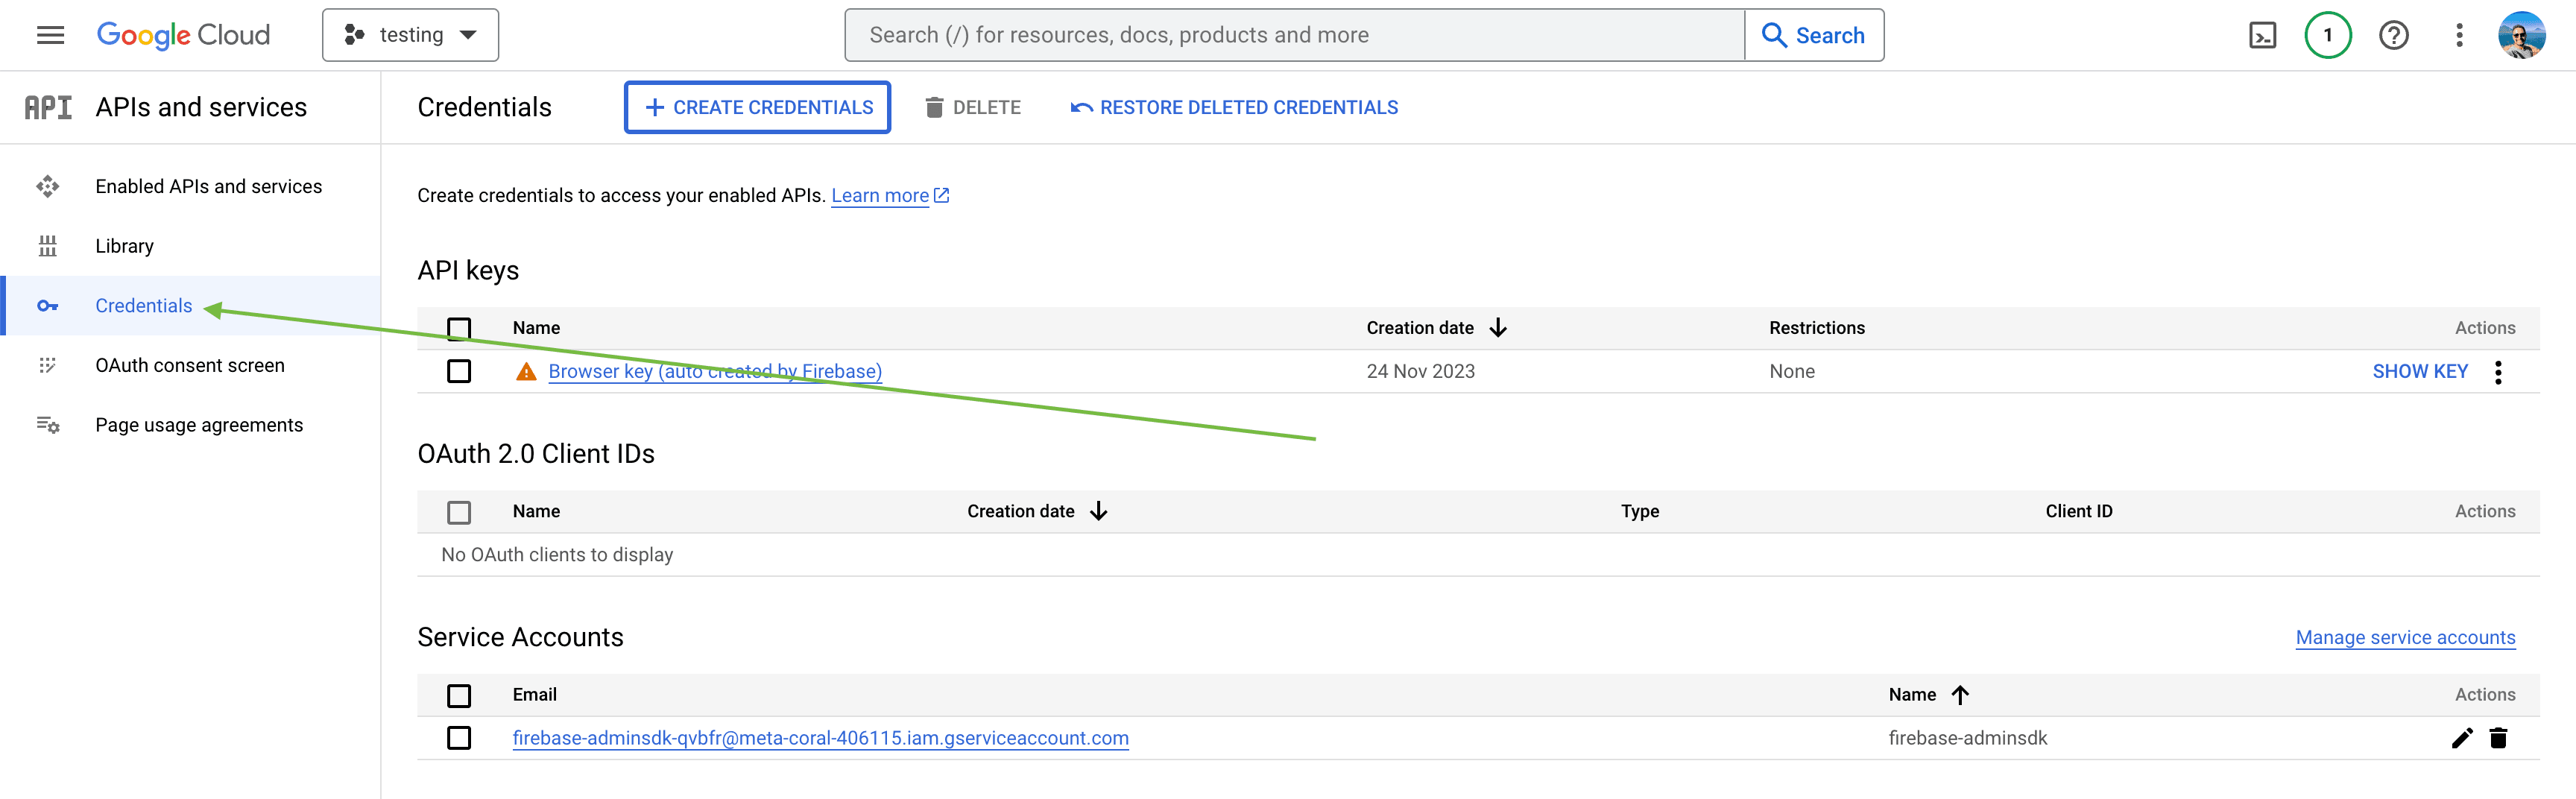
Open the Credentials page of the Google APIs console.
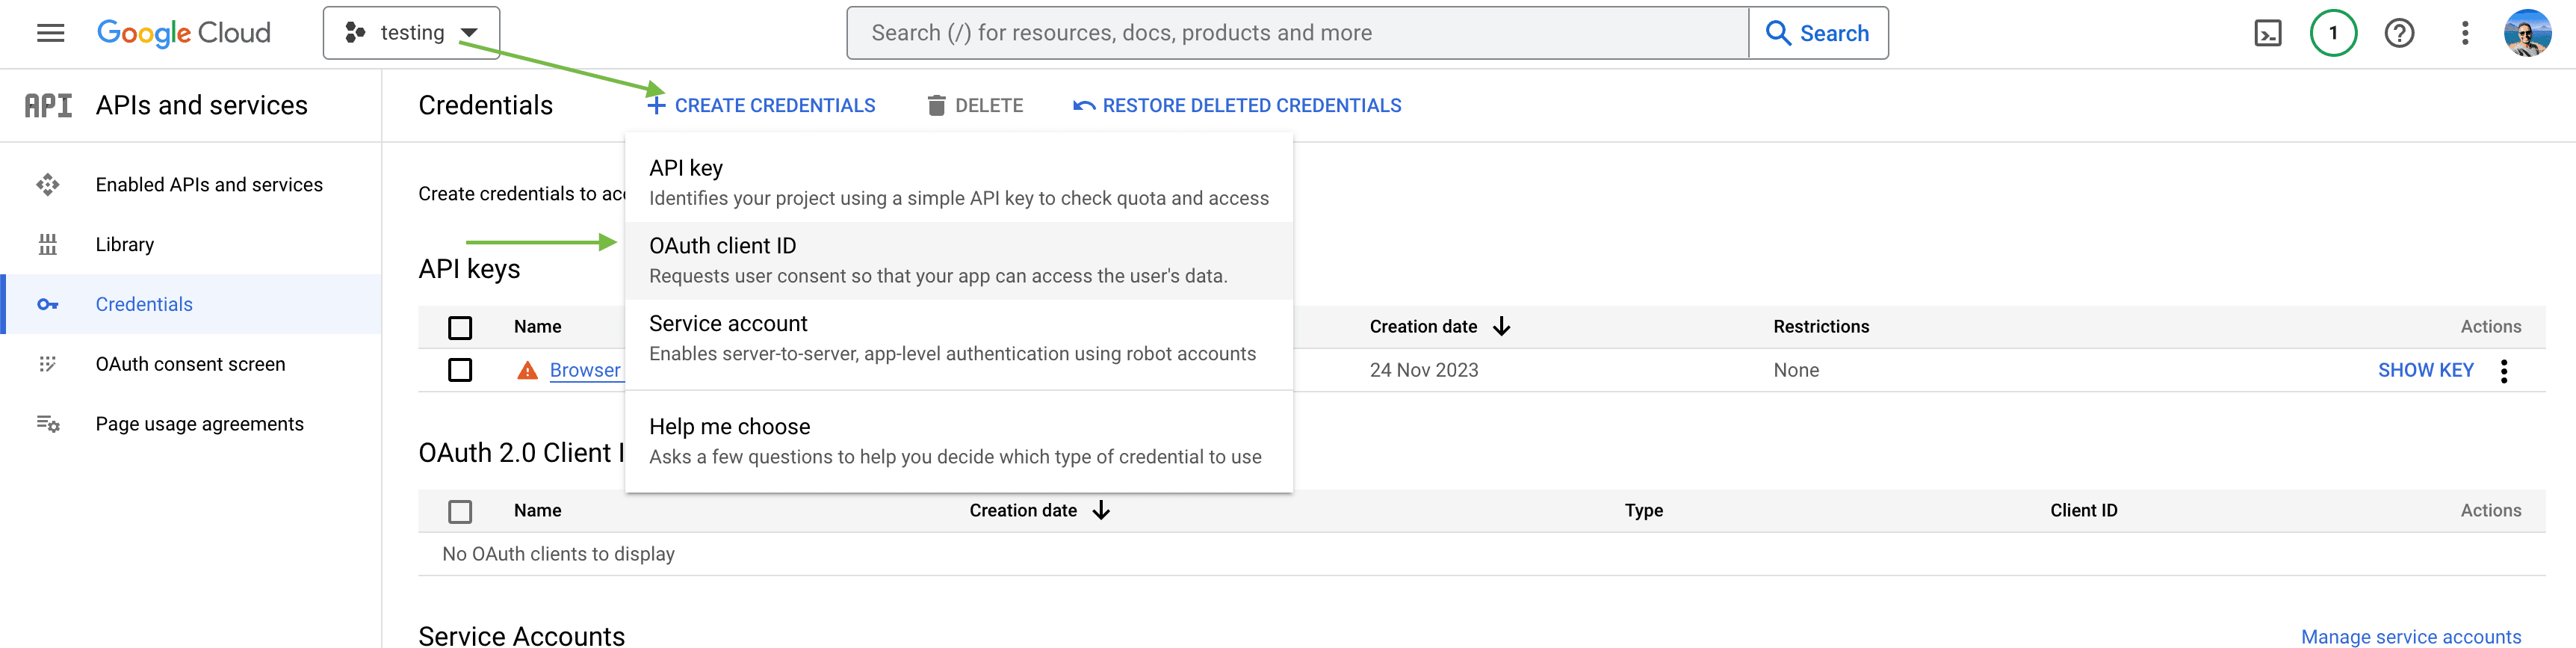
Click Create credentials > OAuth client ID and for Application type select Web application to create a new client ID. To use an existing client ID select one of type Web application.
Create credentials: In the Google Cloud Console, navigate to the "Credentials" page. Create a new OAuth 2.0 client ID credential. Specify the authorized JavaScript origins and redirect URIs for your website. For local tests or development add both
http://localhostandhttp://localhost:<port_number>.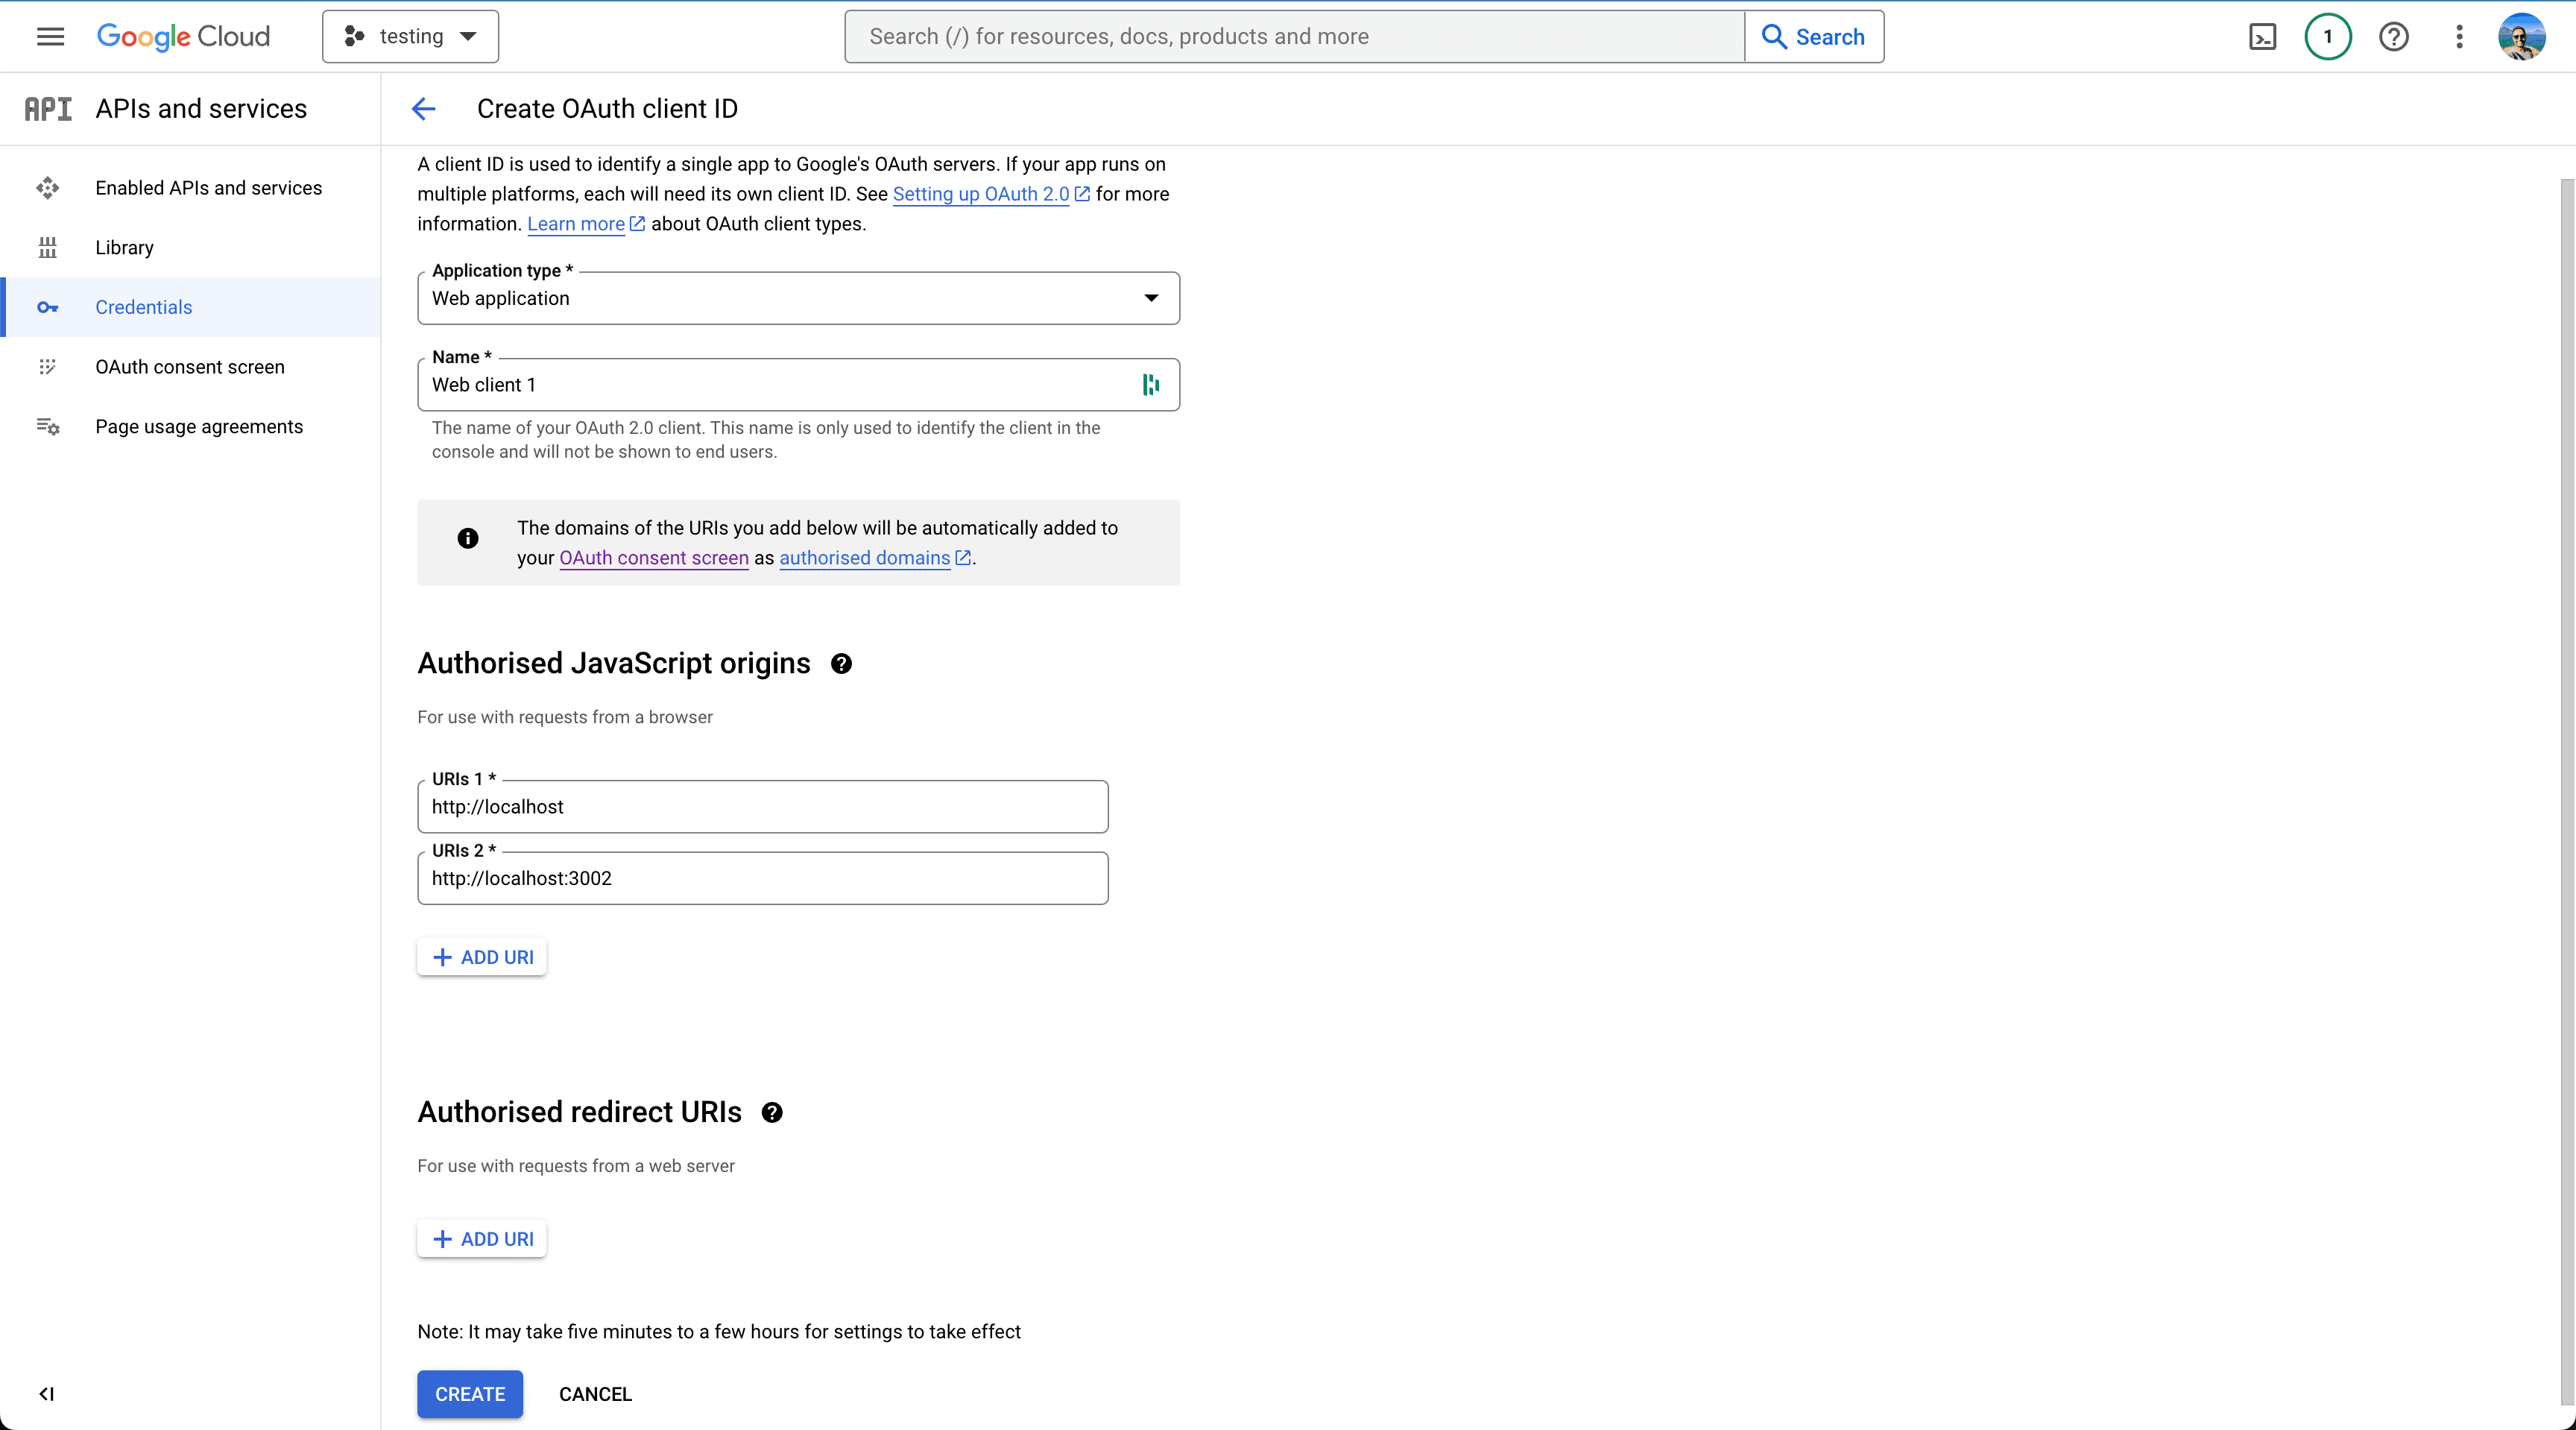
You will now have access to your client ID, which you will need to integrate the button

Code Implementation
- If you don’t have a blank page, you can use this to get you started:
<!DOCTYPE html>
<html lang="en">
  <head>
    <meta charset="UTF-8" />
    <meta name="viewport" content="width=device-width, initial-scale=1.0" />
    <meta http-equiv="X-UA-Compatible" content="ie=edge" />
    <title>My Website</title>
    <link rel="stylesheet" href="./style.css" />
    <link rel="icon" href="./favicon.ico" type="image/x-icon" />
  </head>
  <body>
    <main>
      <h1>Welcome to My Website</h1>
    </main>
    <script src="index.js"></script>
  </body>
</html>
- Create a div in the body in which you’re going to inject the button
<div id="buttonDiv"></div>
- Add a script injecting the SDK to the page
<script src="https://accounts.google.com/gsi/client" async></script>
- Load the Google authentication SDK with your client ID, load the button and create the function to be used as callback to handle the credentials response:
<script>
  window.onload = function () {
    google.accounts.id.initialize({
      client_id: "your client id",
      callback: handleCredentialResponse,
    })
    google.accounts.id.renderButton(
      document.getElementById("buttonDiv"),
      { theme: "outline", size: "large" } // customization attributes
    )
    google.accounts.id.prompt() // also display the One Tap dialog

    function handleCredentialResponse(response) {
      console.log("Encoded JWT ID token: " + response.credential)
    }
  }
</script>
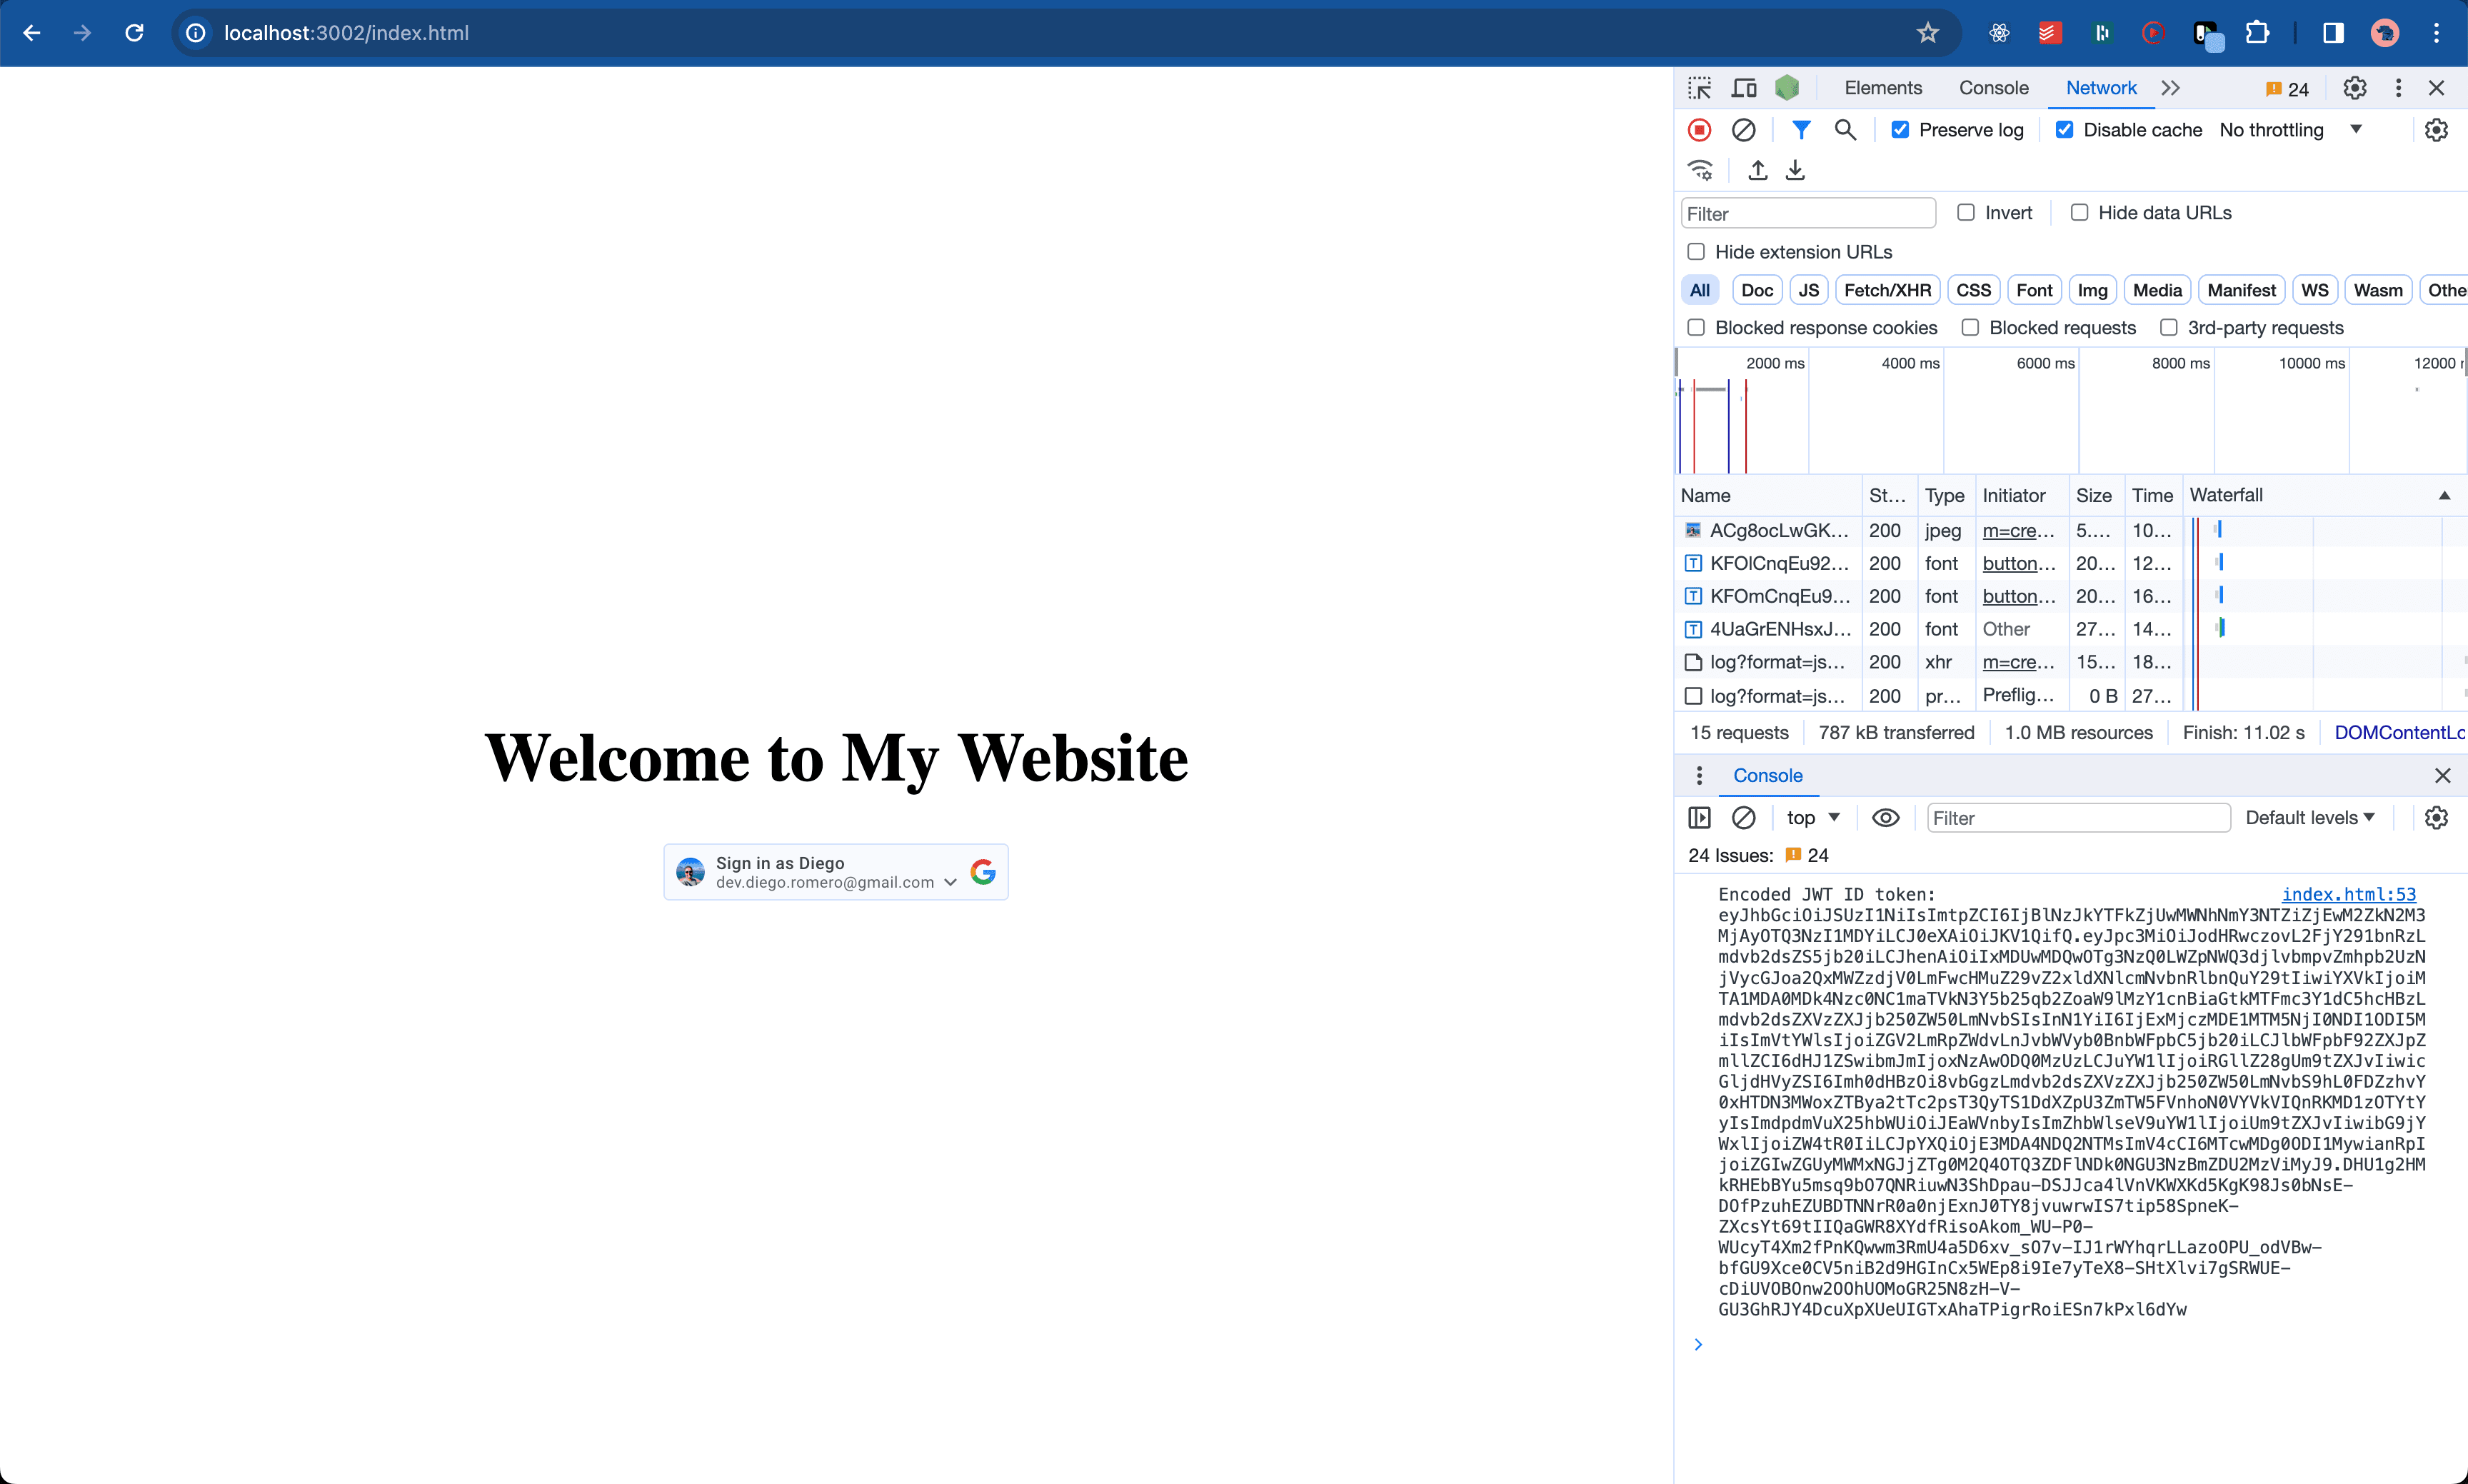
You should now have a fully rendered Google Sign In Button which you can use and receive a JWT token to help you authenticate.
The full code is here:
<!DOCTYPE html>
<html lang="en">
  <head>
    <meta charset="UTF-8" />
    <meta name="viewport" content="width=device-width, initial-scale=1.0" />
    <meta http-equiv="X-UA-Compatible" content="ie=edge" />
    <title>My Website</title>
    <link rel="icon" href="./favicon.ico" type="image/x-icon" />
    <style>
      main {
        display: flex;
        flex-direction: column;
        align-items: center;
        justify-content: center;
        height: 100vh;
      }

      h1 {
        font-size: 3rem;
        margin-bottom: 2rem;
      }

      #g_id_onload {
        display: none;
      }

      .g_id_signin {
        margin-top: 2rem;
      }
    </style>
  </head>

  <body>
    <main>
      <h1>Welcome to My Website</h1>
      <div id="buttonDiv"></div>
      <script src="https://accounts.google.com/gsi/client" async></script>
      <script>
        window.onload = function () {
          google.accounts.id.initialize({
            client_id: "your client id",
            callback: handleCredentialResponse,
          })
          google.accounts.id.renderButton(
            document.getElementById("buttonDiv"),
            { theme: "outline", size: "large" } // customization attributes
          )
          google.accounts.id.prompt() // also display the One Tap dialog

          function handleCredentialResponse(response) {
            console.log("Encoded JWT ID token: " + response.credential)
          }
        }
      </script>
    </main>
  </body>
</html>
For full information on how to display the sign-in button please refer to this document.